Flutter2 릴리즈
프론트 프레임워크/언어 전쟁은 항상 핫이슈다. 그 중에서도 Native를 지원하기 위한 프론트 프레임워크도 히스토리가 상당한데 Apache Cordova, Adobe Phonegap (Shutdown), Ionic 등의 하이브리드에서 Microsoft Xamarin, React Native 처럼 Abstract View to Native View로 생성해내는 Native 프레임워크가 나와서 한창 인기(특히, React Native가)를 얻다가 Flutter가 나오면서 자체 GPU 기반의 GUI 시스템을 품은 프론트 프레임워크가 등장하자 살작 요동쳤다. 한편, 데스크탑 앱은 React / Vue + Electron이 튼튼히 기반을 다지고 있는 중이었고 (적어도 나는) 이게 최선이라고 생각하고 있었는데..
갑자기 두둥, Flutter2가 나왔다는 공지가 뜬 것이다. 아니, 데스크탑(윈도우즈, 맥, 리눅)를 모두 지원한다는 것??

이렇게 되면 Electron은 어떻게 되는 것인가. 이게 주식이라면 Electron에 걸어야할지 Flutter2에 걸어야할지가 너무 궁금했다. 아마다 당장은 Electron가 뿌려놓은 생태계(플러그인 등)도 방대하고, 프론트 언어 및 프레임워크 선택의 자유도, 안정성 등이 훨씬 이득일 것 같긴 한데 Flutter2 개발이 이를 넘어설 경험을 제공한다면?
그래서 좀 살펴보려고 설치해서 Hello World 좀 해본다.
개발환경 셋업
이 문서를 따라하면 된다. 핵심은 1. Flutter SDK를 다운 받고 2. 실행파일(bin) 경로를 PATH 잡아주면 된다. Windows 환경에서 했지만 MacOS/Linux도 크게 다르지 않다.
1. Flutter SDK 다운
사이트에 있는 zip 파일을 받아서 푸는 것도 방법이지만 최신 업데이트나 dev / stable 채널을 쉽게 바꿀 수 있는 git 리포를 땡겨오는 방식을 추천한다.
PS C:\Users\Gamz> mkdir .sdk
PS C:\Users\Gamz> cd .sdk
PS C:\Users\Gamz\.sdk> git clone https://github.com/flutter/flutter.git -b stable
PS C:\Users\Gamz\.sdk> cd flutter
PS C:\Users\Gamz\.sdk\flutter> git branch
* stable
PS C:\Users\Gamz\.sdk\flutter>
PS C:\Users\Gamz\.sdk\flutter> ls bin


    Directory: C:\Users\Gamz\.sdk\flutter\bin


Mode                 LastWriteTime         Length Name
----                 -------------         ------ ----
d-----         3/22/2021   3:13 PM                cache
d-----         3/22/2021  11:56 PM                internal
-a----         3/22/2021   1:42 PM           2143 dart
-a----         3/22/2021   1:42 PM           1426 dart.bat
-a----         3/22/2021   1:42 PM           2143 flutter
-a----         3/22/2021   1:42 PM           2536 flutter.bat
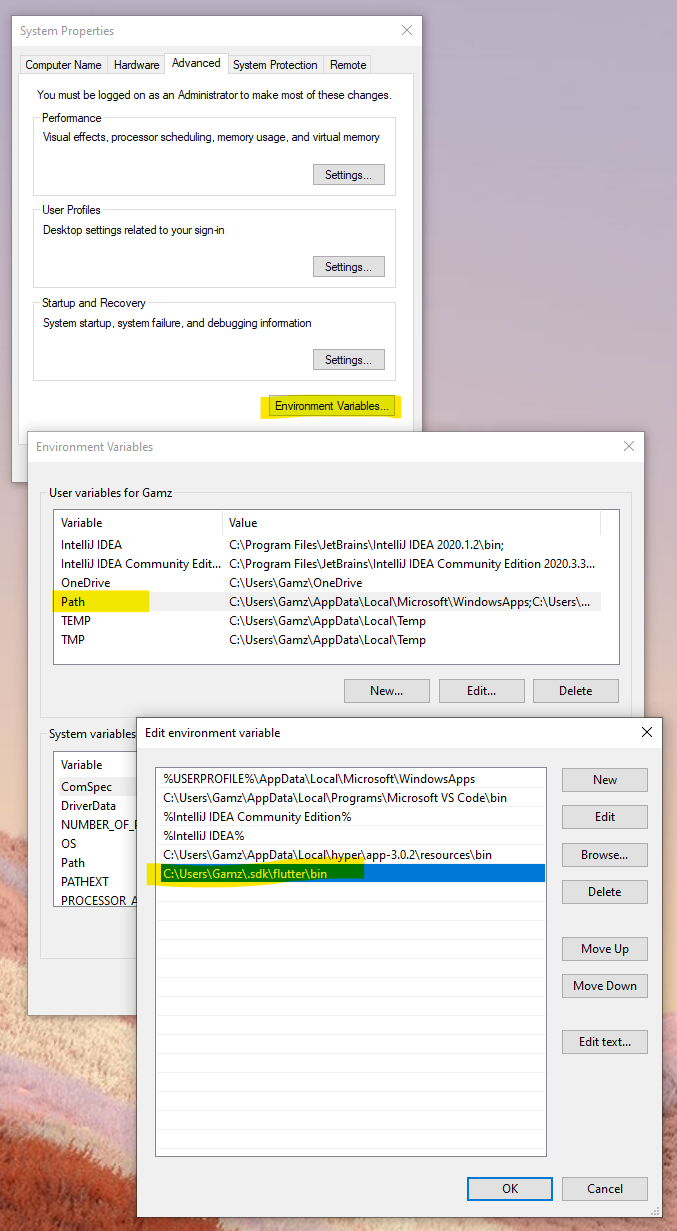
2. 실행파일(bin) 경로 PATH 잡기
위 ls 결과를 보면 flutter 및 dart 실행 파일이 있는 <flutter>/bin을 환경변수 PATH에 추가해주면 된다.
PS C:\Users\Gamz> $env:Path += ";C:\Users\Gamz\.sdk\flutter\bin"GUI로 하고 싶다면 설정 > Environment 등을 검색해서 System Properties를 열어서 아래처럼 설정한다.
3. Flutter 초기화 및 진단 (doctor)
PS C:\Users\Gamz> flutter doctor
Checking Dart SDK version...                                                                                                                Downloading Dart SDK from Flutter engine 3459eb24361807fb186953a864cf890fa8e9d26a...                                                        Building flutter tool...
Running pub upgrade...
Downloading Material fonts...                                    1,850ms
Downloading Gradle Wrapper...                                       74ms
Downloading package sky_engine...                                  695ms
Downloading flutter_patched_sdk tools...                            6.9s
Downloading flutter_patched_sdk_product tools...                    6.9s
Downloading windows-x64 tools...                                   16.6s
Downloading windows-x64/font-subset tools...                     1,953ms
Doctor summary (to see all details, run flutter doctor -v):
[✓] Flutter (Channel stable, 2.0.3, on Microsoft Windows [Version 10.0.19043.899], locale en-US)
[✗] Android toolchain - develop for Android devices
    ✗ Unable to locate Android SDK.
      Install Android Studio from: https://developer.android.com/studio/index.html
      On first launch it will assist you in installing the Android SDK components.
      (or visit https://flutter.dev/docs/get-started/install/windows#android-setup for detailed instructions).
      If the Android SDK has been installed to a custom location, please use
      `flutter config --android-sdk` to update to that location.

[✓] Chrome - develop for the web
[✓] Visual Studio - develop for Windows (Visual Studio Community 2019 16.9.2)
[!] Android Studio (not installed)
[✓] IntelliJ IDEA Community Edition (version 2020.3)
[✓] VS Code (version 1.54.2)
[✓] Connected device (2 available)

! Doctor found issues in 2 categories.
안드로이드 툴체인이랑 스튜디오가 없다는 이슈가 있는데 일단 현재는 데스크탑 앱을 테스트 해볼거라 무시한다.
4. 통합개발툴(IDE) 설정
Flutter는 우리가 사랑하는 툴인 VS Code와도 궁합이 잘 맞다. 아래와 같은 익스텐션들만 깔아주면 Dart 코드 Platform (Windows) 코드 개발 및 디버깅이 잘 된다.


Hello World 프로젝트
이제 간단한 Hello World 프로젝트를 만들고 빌드하고 실행해보자.
1. 프로젝트 생성
PS C:\Users\Gamz\Develops> mkdir flutter-desktop-hello
PS C:\Users\Gamz\Develops> cd flutter-desktop-hello
PS C:\Users\Gamz\Develops\flutter-desktop-hello> flutter create --template=app --platforms=windows helloapp
PS C:\Users\Gamz\Develops\flutter-desktop-hello>
PS C:\Users\Gamz\Develops\flutter-desktop-hello> code helloapp
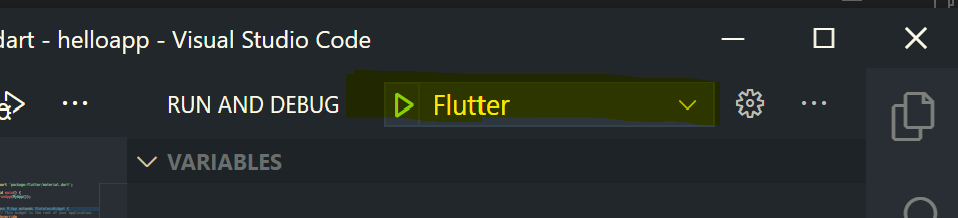
2. 빌드 및 실행
실행 Configuration 하나 추가한 뒤 실행하면 된다.

이런 설정이 생성된다.
{
    // Use IntelliSense to learn about possible attributes.
    // Hover to view descriptions of existing attributes.
    // For more information, visit: https://go.microsoft.com/fwlink/?linkid=830387
    "version": "0.2.0",
    "configurations": [
        {
            "name": "Flutter",
            "type": "dart",
            "request": "launch",
            "program": "lib/main.dart"
        }
    ]
}
그리고 생성된 설정으로 실행해보면,
진짜 Windows Native 앱이 떴다.
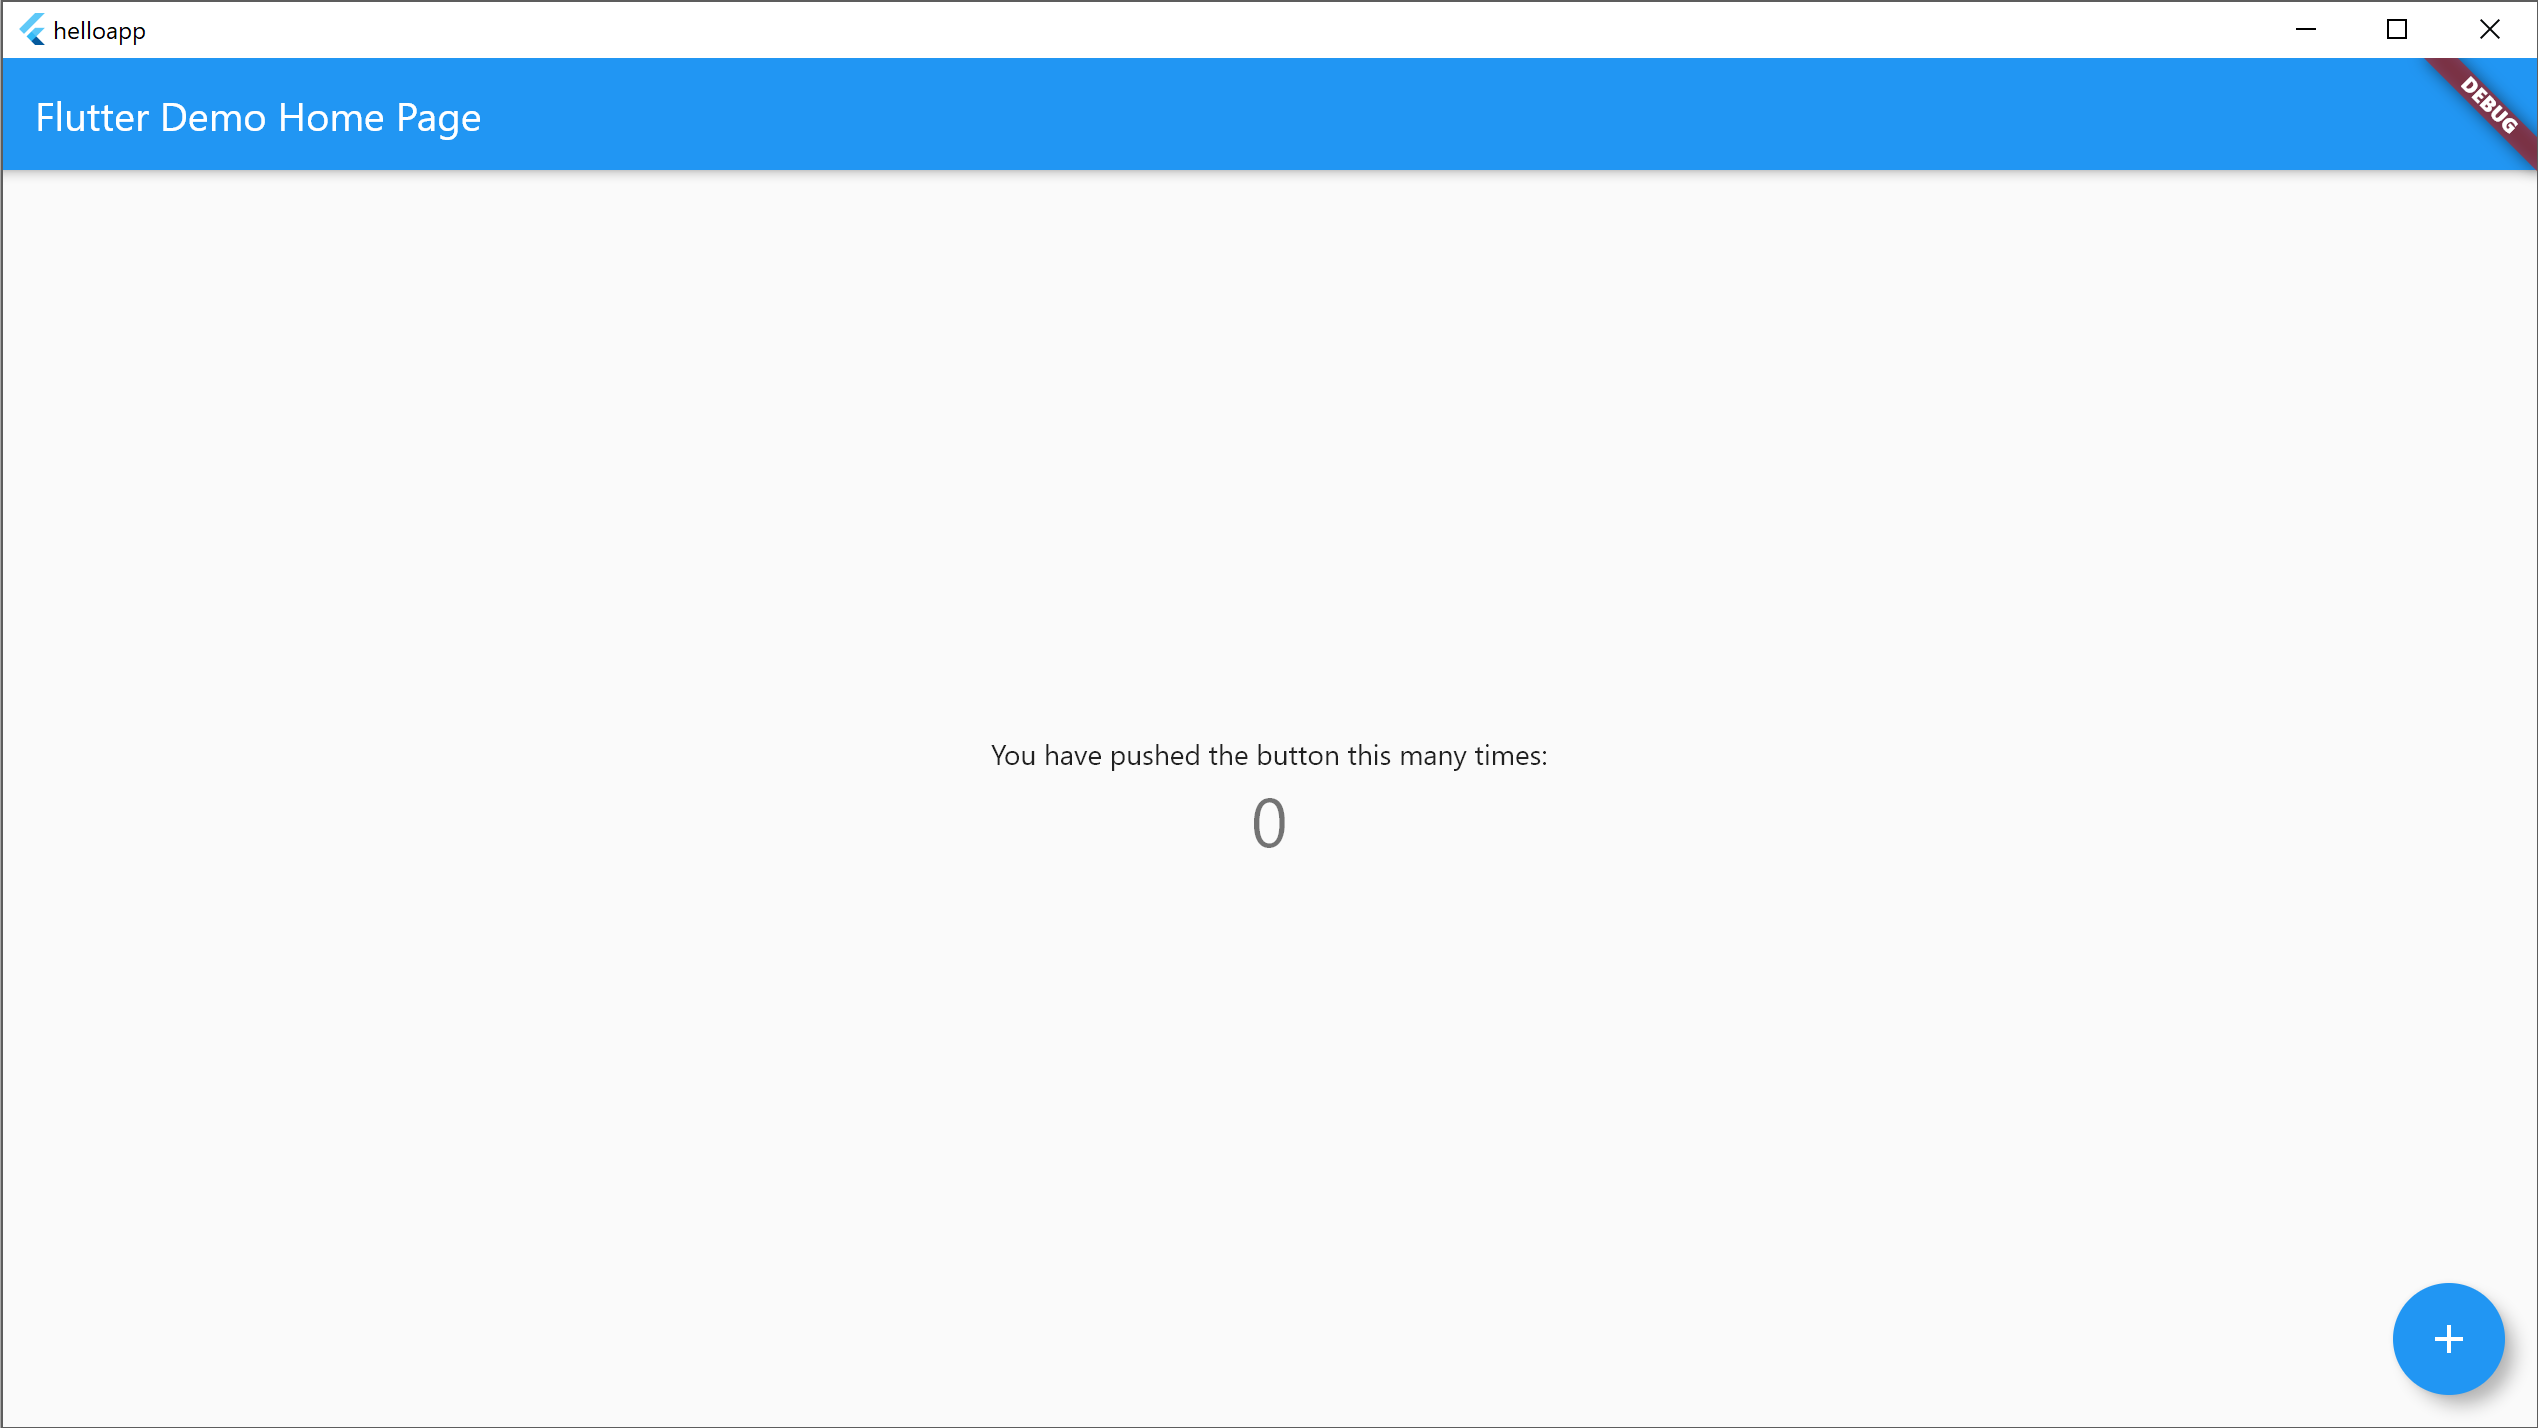
Electron과 마찬가지로 웹 컨텐츠를 Native Container로 감싸고 내부적으로는 Native Platform과의 Bridge를 제공한다. 다만, 이 UI는 Native View(Form)으로 매핑한게 아니라 GPU를 통해 그린 GUI일 것이다. 그렇다면 Windows Look & Feel은 어떻게 지원할 것인가라는 의문이 들었는데 (충분히 알아서 잘 만든) 이것들을 보니 Native GUI Component를 지원하는게 별 의미가 있나 싶기도 하다.
Plugin (Platform Windows) 추가
위에서 기본으로 생성된 예제는 Counter 앱으로 플러스(+) 버튼을 누르면 1씩 증가하는걸 보여주는 앱으로 증가하는 로직이 Dart 코드에 있다. 우리는 이제 Native Platform (여기서는 Windows)과 통신할 수 있는 Flutter Plugin을 하나 추가해서 이 증가하는 로직을 Dart가 아닌 Native에서 해보도록 하자.
1. Plugin 생성
PS C:\Users\Gamz\Develops> cd flutter-desktop-hello
PS C:\Users\Gamz\Develops\flutter-desktop-hello> flutter create --template=plugin --platforms=windows counter
PS C:\Users\Gamz\Develops\flutter-desktop-hello> ls


    Directory: C:\Users\Gamz\Develops\flutter-desktop-hello


Mode                 LastWriteTime         Length Name
----                 -------------         ------ ----
d-----         3/24/2021  10:55 AM                counter
d-----         3/24/2021  10:34 AM                helloapp
2. Native Method 구현
counter 코드를 열고 Dart 부분, Platform (Windows) 부분에 아래 코드를 각각 추가해보자.
// counter/lib/counter.dart

import 'dart:async';

import 'package:flutter/services.dart';

class Counter {
  static const MethodChannel _channel = const MethodChannel('counter');

  ...

  // 추가
  static Future<int> increment() async {
    return await _channel.invokeMethod('increment');
  }
}
// counter/windows/counter_plugin.cpp

void CounterPlugin::HandleMethodCall(
    const flutter::MethodCall<flutter::EncodableValue> &method_call,
    std::unique_ptr<flutter::MethodResult<flutter::EncodableValue>> result) {

  static int counter = 0;

  if (method_call.method_name().compare("getPlatformVersion") == 0) {
    ...
  } else if (method_call.method_name().compare("increment") == 0) {   // 추가
    result->Success(flutter::EncodableValue(++counter));
  } else {
    result->NotImplemented();
  }
}
3. Flutter 앱(helloapp)에서 플러그인 사용하기
사용할 앱(helloapp)의 pubspec.yaml 을 열어 counter 플러그인을 상대경로로 의존성을 추가해주고 main.dart의 카운트 증가시키는 부분에서 이 플러그인을 사용하도록 변경한다.
// helloapp/pubspec.yaml

name: helloapp
...

dependencies:
  flutter:
    sdk: flutter

  # 상대 경로로 플러그인 의존성 추가
  counter:
    path: ../counter
// helloapp/lib/main.dart
import 'package:flutter/material.dart';
import 'package:counter/counter.dart'; // 추가
void main() {
runApp(MyApp());
}
...
class MyHomePage extends StatefulWidget {
...
@override
_MyHomePageState createState() => _MyHomePageState();
}
class _MyHomePageState extends State<MyHomePage> {
int _counter = 0;
// 변경
void _incrementCounter() async {
int newCounter = await Counter.increment();
setState(() {
_counter = newCounter;
});
}
4. 실행 및 정상 동작 확인
VS Code에서 실행해도 되고 커맨드로 실행해도 된다.
PS C:\Users\Gamz\Develops\Study\flutter-desktop-hello\helloapp> flutter run
Launching lib\main.dart on Windows in debug mode...
Building Windows application...                                        ⣟
위에서 처음 실행했을때와 다른 부분은 없지만 카운트를 증가시키는 코드가 Dart가 아니라 Windows Native 코드에서 수행되도록 내부 동작이 변경되었다.
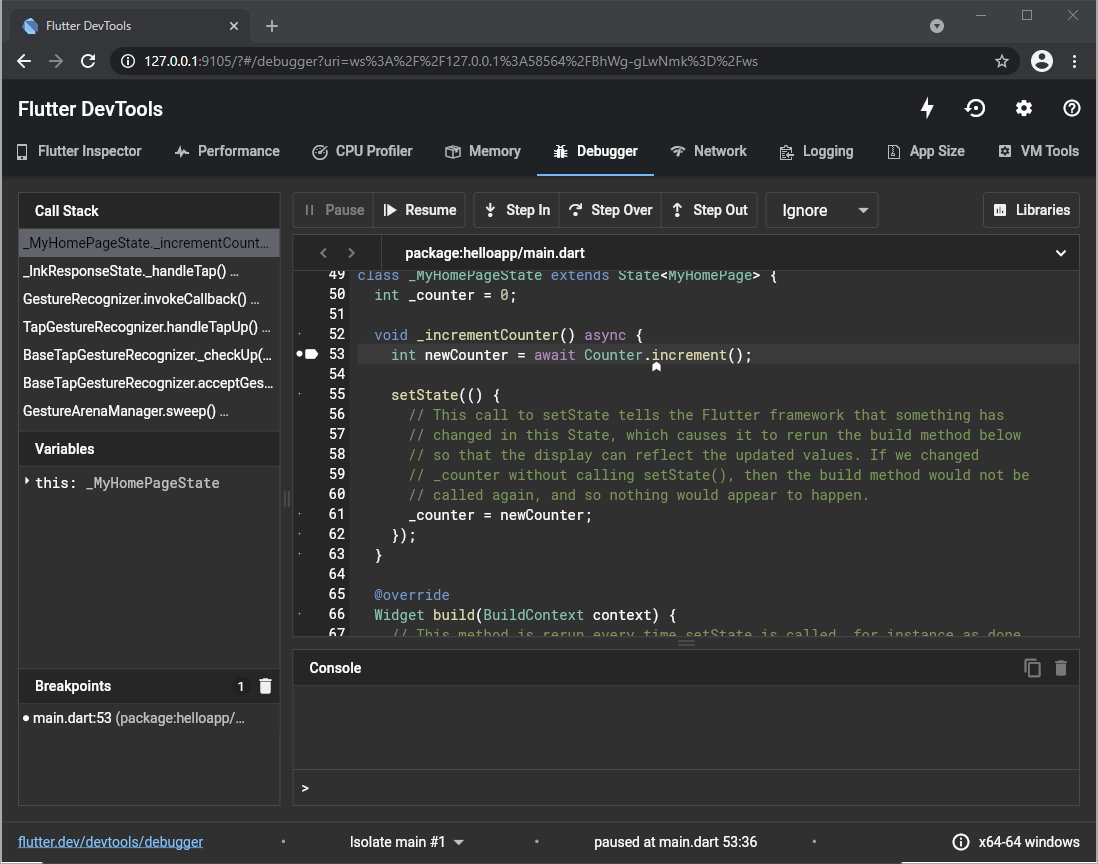
디버깅 (브레이크포인트)
Dart 코드 개발하고 플러그인으로 Native 코드까지 개발한 후에 서로 통신하는 것 까지 봤으니 못할게 없다. 이제 브레이크포인트를 잡고 Dart / Native 영역을 넘나들며 라인단위로 디버깅해보자.
VS Code와 함께라면 정말 간단하다. 일단 Flutter 앱 코드를 VS Code로 열어서 디버그모드로 실행하면 바로 디버깅이 된다. 만약 플러그인쪽 디버깅이 필요하면 플러그인 코드를 VS Code로 따로 열고 실행 중인 Flutter 앱 프로세스에 Attach를 하게 되면 양쪽 모두 디버깅이 가능하다.
이 부분은 설명보다는 직접 보는게 좋을 것 같아서 영상으로 올려본다.
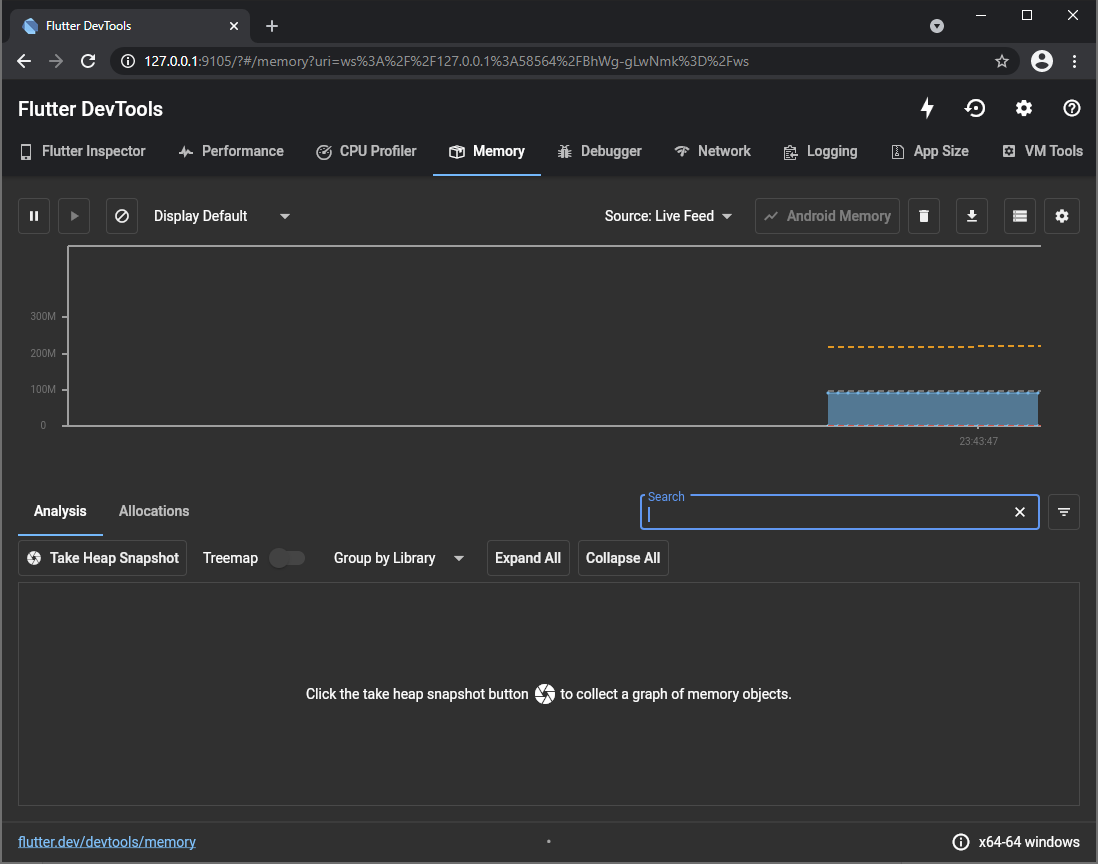
DevTools 사용하기
마지막으로 플러터가 기본으로 내장하고 있는 UI Layout, CPU/Network Profiling, Memory 등을 디버깅할 수 있는 개발 도구들을 살펴보겠다. 이런 것들이 가능하다고 한다. (참고)
* Inspect the UI layout and state of a Flutter app.
* Diagnose UI jank performance issues in a Flutter app.
* CPU profiling for a Flutter or Dart app.
* Network profiling for a Flutter app.
* Source-level debugging of a Flutter or Dart app.
* Debug memory issues in a Flutter or Dart command-line app.
* View general log and diagnostics information about a running Flutter or Dart command-line app.
* Analyze code and app size.
DevTools 는 플러터를 설치하면 기본적으로 설치되지만 혹시 안되어있다면 아래 명령으로 설치할 수 있다.
PS C:\Users\Gamz> flutter pub global activate devtools아래 명령으로 실행하면 DevTools 기능을 제공하는 서버를 하나 띄워준다.
PS C:\Users\Gamz\Develops\Study\flutter-desktop-hello\helloapp> flutter pub global run devtools
Serving DevTools at http://127.0.0.1:9109.

Hit ctrl-c to terminate the server.
브라우저에서 해당 포트로 접속해보면 아래 같은 페이지가 뜨고 실행 중인 앱에 연결할 수 있는 URL을 넣으라고 한다.

이제 실제 앱을 실행해보면 VS Code 같은 경우는 이렇게..

커맨드라인으로는 이런식으로 뜨는데 모두 URL을 하나씩 던져준다. ws:// 혹은 http:// 중에 어떤 것을 써도 상관없다.
PS C:\Users\Gamz\Develops\Study\flutter-desktop-hello\helloapp> flutter run
Launching lib\main.dart on Windows in debug mode...
Building Windows application...
Activating Dart DevTools...                                      2,592ms
Syncing files to device Windows...                                 109ms

Flutter run key commands.
r Hot reload. 🔥🔥🔥
R Hot restart.
h Repeat this help message.
d Detach (terminate "flutter run" but leave application running).
c Clear the screen
q Quit (terminate the application on the device).
An Observatory debugger and profiler on Windows is available at: http://127.0.0.1:58226/ztNghEhG1pQ=/

Flutter DevTools, a Flutter debugger and profiler, on Windows is available at:
http://127.0.0.1:9108?uri=http%3A%2F%2F127.0.0.1%3A58226%2FztNghEhG1pQ%3D%2F
URL을 입력하고 연결해보면 멋진 개발 도구가 나온다. 훌륭하다.
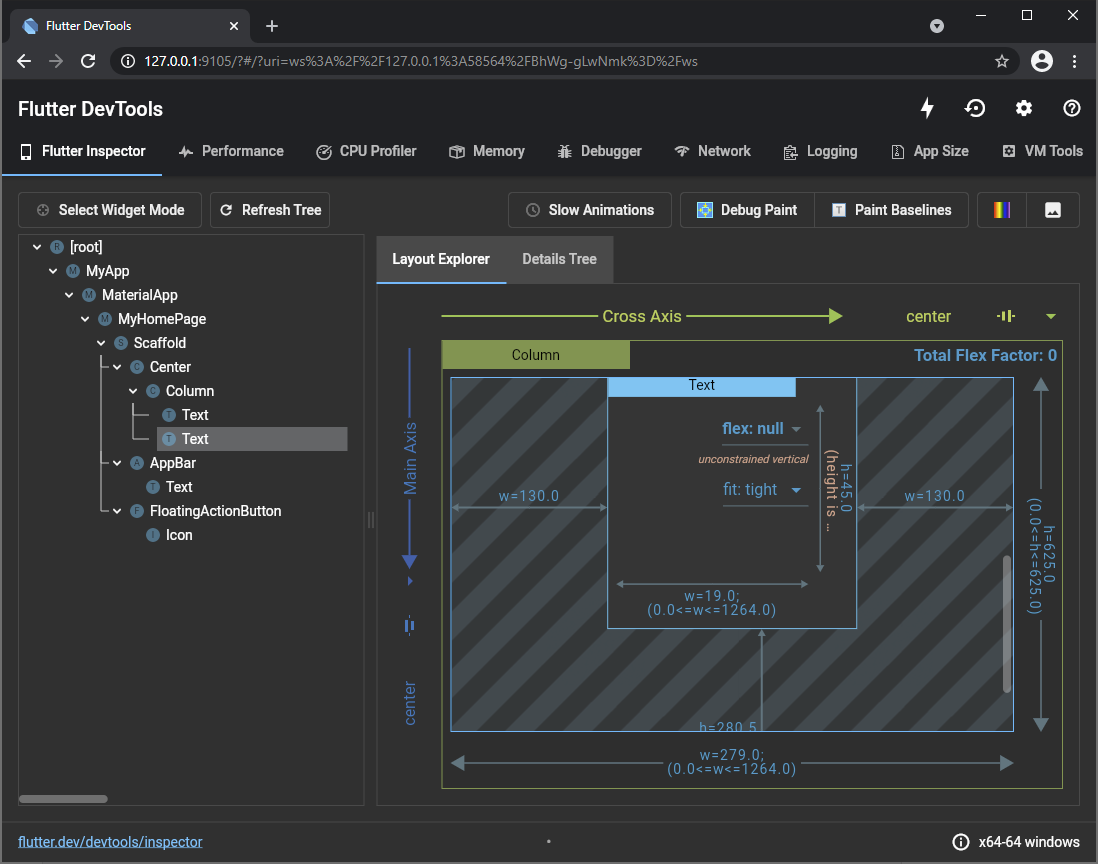
결론
- 일단 개발/디버깅 모두 VS Code와 너무 잘 붙는다.
- Platform Side 개발 환경이 용이해보인다. 다만, 플러그인 생태계 싸움이 될 듯.
- Dart가 처음에는 어색했는데 느슨한 모드의 Typescript 보다 더 Strict 해서 마음에 든다.
- Electron은 껍데기만 제공했기에 Render Framework 혹은 State Management는 알아서 해야하는 점이 늘 괴롭고 고민이었는데 Flutter는 그 부분의 컨벤션이 있기 때문에 오히려 적응하기가 (파기만 하면) 수월해보인다. (하지만 이부분은 내가 둘다 깊게 안써봐서 드는 생각일 것 같다. 추후에 Electron을 좀 써보고 다시 한번 더 정리해보자)
더 보기
Learn Flutter Clean Architecture & TDD - Full Course (Flutter Tutorial) - YouTube
'스케일업 > 개발환경' 카테고리의 다른 글
| Apple Silicon(M1)에서 Python 환경 제대로 설정 (1) | 2023.09.01 |
|---|---|
| Git over SSH on Windows (0) | 2021.03.19 |